Don't forget to smile :)

Monday, 13 April 2015

Product review!

Hi everyone!!
Today it's just giraffe because we couldn't meet up to write this. Anyway today I am going to tell you about 3 hair products!

The first one is the Batiste Floral and Flirty Blush Dry Shampoo! I've had this for a few weeks now and I think it's great! It's not good to wash your hair everyday so if your hair is looking a bit greasy or oily and you don't want to wash it just spray some dry shampoo in and rub it in (so your hair doesn't stay white!!) and you are good to go! BTW: it smells amazing as well!!


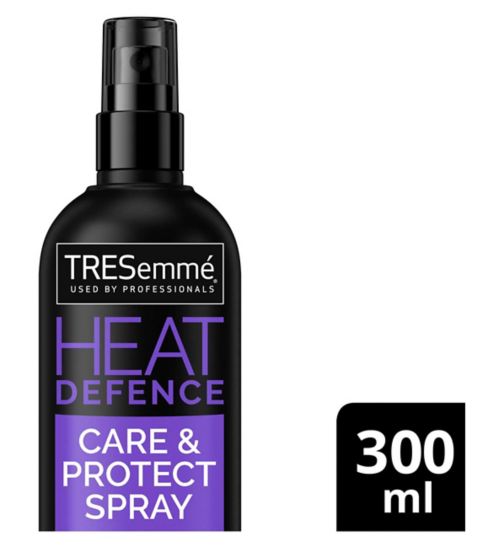
The second product is the TRESemmė UV Filter Heat Defence. I never used to use heat protectant but I actually think it makes a lot of difference because my hair feels a lot softer and doesn't feel as 'frazzled' if that makes any sense! This heat protectant can protect your hair up to 230 degrees C.

The final product has literally become my best friend!! It is the got2b oil-licious by Schwarzkopf ( did you know that Schwarzkopf actually means black head in German?!?! Haha 😏) anyway this is an Arian oil that your hair instantly absorbs and it makes your hair super shiny, sleek and tame from any fly aways. I have used Argan oil before but it was a lot more expensive than this and it did exactly the same job! This one only cost about £3. To use this I just comb my hair after I have a shower and then put the oil in and then put the heat protectant (if I use a hairdryer that day). I would suggest using 3-5 pumps on wet hair and 1 pump on dry hair. This is because it can make dry hair look greasy - since it is an oil. If you do put it on dry hair I would highly suggest not putting on the roots because your hair will definitely look greasy!!

You can purchase all of these products from boots, Superdrug and most supermarkets. 
I hope you enjoyed this blog post and if you try any of these products out make sure to tell us what you think/thought of them! 
You can tweet us or tag us in pictures.....
Twitter: @cailascreations
Instagram: @cailascreations 
You can also use the hashtag #cailascreations if you want us to see any of your posts! If you want you can leave us a comment! We will make sure yo reply ASAP! (The comment section is at the bottom of each post in case you didn't know)
Love Caila xx

Friday, 3 April 2015

Easter DIYs!!

Hey Guys!

So today we are going to show you 3 DIYs for Easter!! We are really excited because this is our first proper DIY post, so let's get started!

1. Rice Krispy/ Cornflakes Chocolate Nests: This is a very popular thing to make at Easter time.
 First melt some chocolate. Next mix in the cereal. Then put the mixture into cupcake or muffin cases and allow to set (when putting the mixture into the cases make a little dent or hollow part in the center like a real nest). Finally once they have set, fill the hollow part with mini eggs or candy of your choice!!

2. Bunny in a jar : (Don't worry you won't literally put a real life bunny in a jar!) What you need to do is fill a jar with cotton wool ball or marshmallows or anything white and round! Then place the lid back on the jar and make paper rabbit ears out of pink and white coloured paper/card, next stick the ears to the lid with glue or sellotape. Finally draw and cut out a rabbits face then stick it to the front of the jar to complete the rabbit! For any extra touches add a cotton wool ball to the base of the back for a little tail or maybe add some feet made from card.

3. Decorating Eggs!
Firstly, you will have to hard boil some eggs (as many as you like). Once they have cooled, be as creative as you wish! You can dye the eggs or paint them (we recommend acrylic paint)! If you want you can get some inspiration from google images.

We hope you enjoyed this post! Make sure that if you recreate any of these to send us a picture on Instagram, Twitter (use the hashtag #cailascreations) or even in the comments! If you send us them we will make sure to give you a shoutout!!

Instagram: @cailascreations
Twitter: @cailascreations

Love Caila xx


Comments

Hey guys!

So this is going to be a very small and quick blog post but we will be doing another bigger one once we have published this one!

So we got our first comment! We are really grateful and excited about this and we are looking forward to our blog becoming bigger and better!

We would LOVE it if more of you out there, silently reading this blog, would put a comment or two on our blog giving us an idea of what you would like to see on CailasCreations!

Thank you again! We never thought we could get this far! We have just hit 800 pageviews!!

Love Caila xx

Monday, 23 March 2015

Urban Decay - The Naked Palettes

Hey Everyone!

So first off, sorry this post is a day late!
Also, it is just Mouse here!
So today, I wanted to talk to you about the three Naked Palettes by Urban Decay! I am only going to tell you about the Naked 1,2, 3 palette, not the other Naked items that Urban Decay do like the Naked on the Run palette.
So let's get started!

First off, the Naked Palettes are no where near cheap! At a pricey £38 or $54 per palette at the moment you would probably have to save up for them! There are some great dupes in drugstores though!

The Naked palettes are very pigmented and beat many other high end eye shadows with the outstanding quality.

So the first Naked palette, if you haven't seen it before, looks like this...
The colours are bronze-hued according to the Urban Decay website. It's packaging is magnetic and has  a velvety texture to the outside of it.

The Naked 2 Palette looks like this...
It has a lovely range of shades for any occasion. These colours are taupe-hued. It comes in a tin like packaging.

The last of the Naked palettes is the Naked 3, which looks like this...
These are beautiful rose-hued neutrals which add a bit of colour to the boring brown eyeshadow look! The packaging is very similar to the Naked 2's packaging put is slightly more textured.

Overall, the palettes are worth the money because of their outstanding quality! Just try and save up for them!

Which is your favourite eyeshadow palette?
Also, any other products you would like us to talk about?
If so be sure to check out our Instagram and Twitter!
We will be giving out shoutouts for anyone who answers either of those questions!
Twitter: @cailascreations
Instagram: @cailascreations

Love Caila xx
Tuesday, 17 March 2015

Starting off with make up: recommendations

Hey everyone!
It's just giraffe here today because again we couldn't meet up in the weekend. But anyway, today I'm going to give you a few recommendations of make up to get you started with make up!

1. If your only just starting with make up I wouldn't go right ahead with foundation, I would just start with wearing concealer (you can skip this if you don't get spots, blemishes or red blotchy skin). But the concealer that I recommend is the Collection Lasting Perfection! This is really affordable and gives very good coverage.

2. I think mascara just finishes off your eyes without the need to wear eyeshadow. The mascara I would recommend is the Maybeline the Falsies. If you can afford it, I would recommend MAC Zoom Lash- this honestly does NOT budge!!

3. Blush wise I would suggest Collection shimmer shades. I think we have mentioned this before in a post but it just gives an amazing subtle rosey effect on the cheeks!! (You can tell I'm a fan of it haha)

4. Finally, the lips! If you want to you can just apply lip balm if your like me and you prefer doing your eyes. But if you want a natural look I would go for the Tanya Burr lipgloss in Chic! Honestly, this is like the perfect nude shade and it looks good on anyone! If you want a neutral lipstick, I would go for one from MUA! MUA Lipsticks are really affordable and are a good pigmentation level.


I think these 4 things are all you need If you are starting off with makeup and I've worn makeup for a while now and sometimes I only wear the above!! If you want something extra, I would wear a frosty or natural eyeshadow on the lid and blended at the crease.
Also, if you want to powder your face because it looks a bit shiny, I would use the rimmel stay matte powder!
I hope you enjoyed this post and remember to tweet us and follow us on........
Twitter: @cailascreations
Instagram: @cailascreations

Love
Caila xx

Monday, 9 March 2015

Spring Fashion

Hey guys!

So it's mouse today, unfortunately giraffe and I couldn't meet up! *cry cry* so I thought I would do a nice quick and easy, step by step post about Spring Fashion!

So first off you need to swap your heavy winter jacket for a nice thinner one!
So depending on where you live (you might not even need one) you need to pick one suitable to the temperature! Sorry if you live in the Southern hemisphere and it isn't Spring!

Pastel colours are always in during spring and all the dark colours from winter are out!
If you don't feel comfortable with brights and pastels but still want to make your outfit more 'springy' add a small amount of colour? Maybe just a bit of detailing on your t-shirt or go for a lighter makeup look!

Add some nice accessories! Floral = spring! So maybe a nice flower crown, and necklace that incorporates flowers!
Go mad with the floral theme! It doesn't just have to be accessories, it could be embroidered on your cardigan/trousers etc.

There are so many good shops to buy springy things from but we really like...
Primark
Topshop
New Look
Forever 21
Target

Ok, So sorry for the short post today! Hope you liked it anyways!
Where are your favourite places to shop?
Tweet to us or follow us on Instagram!
Twitter: cailascreations
Instagram: cailascreations

Love Caila xx

Sunday, 1 March 2015

A-Z Beauty Tips!

Hey guys!

First off, we are TWO pageviews off 700!!! How incredible is that? We have been working on this blog for less than a YEAR! So thankyou!!

So onto the post! Today we wanted to do a really cool and unique blog post so here it is...
A-Z Beauty Tips!

Enjoy!

A- Angled brushes are good for doing eye brows or making smokey eyeliner with eye shadow.

B- Bold colour pop: if you aren't comfortable with colour but want to step out of your comfort zone try a colourful shadow just on you lash line.

C- Caila's Creations is a great place to get make up tips!!!Haha x

D- Dark colours: Try a very small amount of dark eyeshadow lining your lids and smoke out with an angled brush (look at A) for a soft, smokey look!

E- Eyeliner 101: when doing a thick line, to make it look glossy, do the outline with a marker (one for eyes!!) and fill it in with a liquid liner :)

F- Favourite Budget Beauty Brands: MUA, Simple, Collection, Elf and Barry M.

G- Gel: Eyebrow gels are great if you're in a hurry because you simply have to swipe it along the brow and your done! Also if your starting off with eyeliner, gel eyeliner with an angled brush is really easy to apply.

H- Hair: Thought we would throw in hair in here as well! Try not to put your hair up at night because when your hair is in a bobble it is extremely bad for your hair and easily breaks it. If you put it up at night and sleep with it up for around 8 hours every night it can damage it very easily so stay away from the bobbles!

I- Individual lashes for a more natural look than a full strip of false lashes!

J- Jet black eyeshadow looks incredible when applied lightly into the crease and blended out well!

K- Kabuki Brushes are great for powder and blending!

L- Lips: If you have a really nice lipstick that you wish was matte, just dust some translucent powder on top for a matte finish!

M- Manicure: If you don't have nail art tools, a toothpick is a good replacement for a dotting tool, and if you put two pieces of tape next to each other on the nail and fill it in with nail polish you can get a stripe that replaces a striper brush.

N- Night time: In the evening a few things you should make sure to do are: take off make up, cleanse your face, tone (if you have enough time) and moisturise.

O- Open pores: if you have very open pores there are some products that can help! Why not try the POREfessional by Benefit?

P- Plumper lips; to get plumper lips, exfoliate your lips with a toothbrush. Then suck on a small lid (for example) for about 30 seconds. Apply a lip liner just outside the natural lip line. Apply a lipstick, highlight the very middle of your lips with a frosty eyeshadow. Finally add a  super shiny and glossy lipgloss!

Q- Quick makeup application: Instead of blending foundation for HOURS (jk) replace it with a touch more of concealer. Do this with most of your makeup steps, try and replace them with a slightly quicker alternative and think, do you really need all that makeup on today? Is it necessary? Sometimes this tip is really useful when in a rush!

R- Rhinestones are pretty and perfect for a quick but stylish and professional accent on the nails.

S- Smile when applying blush so that you can see the apples of your cheeks easily.

T- Tear duct/ Inner corner: Add a light shimmery shadow for a pretty highlight.

U- Under eye circles: Apply concealer in a triangle/V Shape on the bags and then pat lightly to blend in for better coverage.

V- Viva glam Nicki range by Mac is beautiful if a bit pricey!

W- White eyeliner: Apply to the tight line and waterline for the effect of wider eyes.

X- Xtreme (Yes that's not how to spell extreme but X is tough!) volume from different hair care products including Dry Shampoo. We recommend Batiste!

Y- YouTube is a great place for beauty.

Z- Zzzz... Catch them whilst you can!

OK so some of these were a bit dodgy so if you can think of better ones, tweet us or follow us on Instagram! We have recently gotten 200 followers on Twitter and are now aiming for three hundred. We follow back on Twitter and Instagram!
Twitter: @cailascreations
Instagram: @cailascreations

Love Caila xx